
These rice krispies treats with chocolate are an easy no-bake dessert perfect for chocolate lovers that also love a marshmallow treat! They're super simple to make, have that classic rice krispies treat aspect, and are made extra special with a layer of chocolate and a chocolate drizzle.

These easy dipped treats are a fun, extra sweet, and pretty version of the classic rice krispies treats! They're a great no-bake recipe that are a jazzed up twist on the classic version. With a sprinkle of flaky salt, they're the perfect salty and sweet treat! They'd be the best for Valentine's Day, birthday parties, or any chocolate cravings.
More Recipes You'll Love
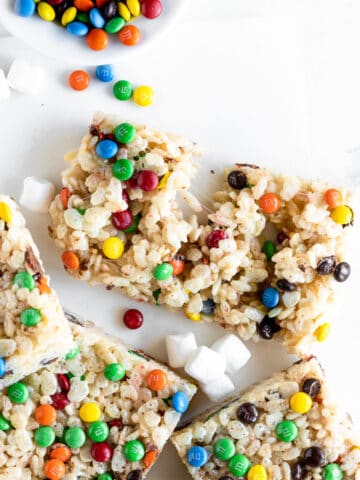
If you're looking for another rice krispies treats recipe then you'll love our Rice Krispies Treats with M&Ms that have the absolute best colorful crunch! For another chocolate treat be sure to check out our fudgy and decadent Brownies with Cream Cheese Frosting.
Jump to:

Why You'll Love these Rice Krispies Treats
- Next level version of the original. Between the two types of chocolate drizzle and a little flaky salt, these are an elevated version of the original crispy treats!
- Super easy recipe. These are very easy to make and the majority of the time of the recipe is the time it takes for them to set!
- Great for chocolate lovers. If you love a super chocolatey dessert then you will love these!
Ingredients for the Chocolate Dipped Rice Krispies Treats
These rice krispies treats with chocolate have a short and simple ingredients list which make them an easy homemade treat!

- Butter - Some rice krispies treats recipes call for less butter, but I find 1 stick makes for extra flavorful and gooey treats! And if you're worried about the amount, it really doesn't amount to much per rice krispies treat! 🙂
- Mini marshmallows - 16 ounces is the perfect amount to make these super gooey marshmallow bars. Certain brands also sell a 16-ounce bag which is helpful! I personally haven't tried it but if you can only find large marshmallows then I would just weigh them out to equal 16 ounces and I think it should work out fine. If you're using large marshmallows just make sure the heat is low because they will take longer to melt and you don't want the melted part to burn.
- Vanilla extract - A good amount of vanilla in this recipe is key! The flavor pairs so well with the chocolate and adds an extra delicious flavor.
- Kosher salt - Don't skip this! Also ¼ teaspoon of salt is definitely a little bigger than a pinch of salt, so make sure you add enough because it helps bring out the flavor and balances out the sweet chocolate dip.
- Rice krispies cereal - These cereal treats wouldn't be complete without the classic rice cereal! One thing to note is I've noticed a slight discrepancy between weighing out the cereal in grams and measuring it with cups, so when you're measuring out the 8 cups be sure not to overfill the cups at all otherwise you will end up with too much cereal to marshmallow ratio.
- Milk chocolate melting wafers - I absolutely love using the Ghirardelli Milk Chocolate Flavored Melting Wafers because they're super easy to melt and you don't need a double boiler or to add anything like coconut oil like you might need to do with regular chocolate chips. One bag is enough to dip all the bars halfway up. They're a little pricey, but as is most chocolate unfortunately! You can use different kinds of chocolate, just adhere to that chocolate's melting instructions.
- Dark chocolate melting wafers - Ghirardelli also has Dark Chocolate Flavored Melting Wafers which I think are perfect for drizzling over the milk chocolate! Just make sure the milk chocolate has solidified before doing so otherwise they will run together. You'll only need about 4 ounces, and I find it easiest to add the melted chocolate to a ziplock bag and cut a tiny piece of the corner for drizzling.
- Flaky salt - A sprinkle of flaky salt over the drizzled chocolate adds the best punch to cut the sweetness of the chocolate! Highly recommend this. I use Maldon flaky salt which is delightful!
See recipe card below for quantities.
Step by Step Instructions
These easy no-bake treats are a perfect quick dessert that would also be super fun to make with kids!
Step 1: Prepare the pan. Line a 9x13-inch pan with parchment paper and lightly spray with cooking spray.
Step 2: Melt marshmallows into butter and add vanilla and salt. In a large pot, melt the butter over medium heat, then add the mini marshmallows. Stir and continue stirring until the marshmallows are completely melted. They won't seem like they're incorporating with the butter at first but they eventually will. Add the vanilla extract and salt and stir to combine.


Step 3: Stir in the cereal. Remove from the heat and add the cereal. Use a wooden spoon to stir until the marshmallow is evenly distributed and all of the pieces of cereal are coated. Make sure to get any remaining marshmallow from the bottom of the pot. If your pot is too small, you can also transfer the mixture to a very large bowl to combine everything more easily.


Step 4: Add mixture to pan. Pour the mixture into the prepared pan, and use a greased rubber spatula to gently spread it evenly, making sure not to press them down too hard or the treats will be dense.

Step 5: Let sit then cut into rectangles. Let sit at room temperature for roughly 1 hour (see note), then remove from the pan and cut into 16 rectangles by cutting the whole thing in half lengthwise then cutting 2 rows of 8 rectangles.

Step 6: Prepare wire rack. Set a large wire rack on parchment paper and lightly spray it with baking spray.
Step 7: Melt milk chocolate then dip rice krispies treats. Melt milk chocolate melting wafers in a small bowl. Once completely melted, dip the top and sides of each rectangle about halfway up, then let any excess melted chocolate drip off. You can dip the bottoms if you want to, but I personally find it just makes them a little messier and can make them stick to the wire rack. Set each on the wire rack until chocolate has fully hardened (see note).


Step 8: Melt milk chocolate then drizzle rice krispies treats and sprinkle with flaky salt. Melt the dark chocolate in a small bowl then pour into a ziplock bag. Cut just the tip off one corner, then drizzle each milk chocolate section of the rice krispies treats with the dark chocolate. Sprinkle with flaky salt right away, let the chocolate set, then enjoy immediately for the best texture!

Pro Tip!
Make sure to wait to drizzle on the dark chocolate until the milk chocolate has hardened otherwise the two chocolates will run together and they won't look as pretty.
Tips for Making these Chocolate Rice Krispies Treats
- Don't press the rice krispies marshmallow mixture too hard into the pan otherwise the treats will be dense and not as gooey. Make sure to use a greased spatula when patting them into the pan because the marshmallow mixture will stick to your wooden spoon.
- Make sure to dip the rice krispies rectangles into the melted chocolate right away before it hardens up.
- Be sure to spray the wire rack with nonstick cooking spray otherwise they might stick to it when the chocolate dries.

FAQs
I find those to be the easiest to melt/work with, but if you can't find them you could use milk chocolate chips and semi-sweet chocolate chips, and proceed with the melting instructions on the package.
Yup! You can use a 9x9 pan, the rice krispies treats will just be thicker and depending on how you cut them there might be less of them.
If you spray your knife with a little baking spray before cutting them it helps ensure the knife doesn't stick to them and will help you get nice even, clean-cut rectangles.

Storing and Freezing
These rice krispies treats are best right away but once the chocolate has hardened they can be stored at room temperature in an airtight container for up to 3 days. If you're layering them in a container, you can separate the layers with a sheet of parchment paper.
I don't recommend freezing these chocolate dipped rice krispies treats.

Did you try this recipe? If so please leave a ⭐️ rating and/or comment below! Also, make sure to tag us on Instagram @doublethespoonfuls so we can see what you create.
📖 Recipe

Rice Krispies Treats with Chocolate (Chocolate Dipped!)
Ingredients
- 1 stick butter
- 16 ounces mini marshmallows
- 1 ½ teaspoons vanilla extract
- ¼ teaspoon kosher salt
- 8 cups rice krispies cereal (see note)
- 10 ounces milk chocolate melting wafers (see note)
- 4 ounces dark chocolate melting wafers
- flaky salt
Instructions
- Line a 9x13-inch pan with parchment paper and lightly spray with cooking spray.
- In a large pot, melt the butter over medium heat, then add the mini marshmallows. Stir and continue stirring until the marshmallows are completely melted. They won't seem like they're incorporating with the butter at first but they eventually will. Add the vanilla extract and salt and stir to combine.1 stick butter, 16 ounces mini marshmallows, 1 ½ teaspoons vanilla extract, ¼ teaspoon kosher salt
- Remove from the heat and add the cereal. Use a wooden spoon to stir until the marshmallow is evenly distributed and all of the pieces of cereal are coated. Make sure to get any remaining marshmallow from the bottom of the pot. If your pot is too small, you can also transfer the mixture to a very large bowl to combine everything more easily.8 cups rice krispies cereal
- Pour the mixture into the prepared pan, and use a greased rubber spatula to gently spread it evenly, making sure not to press them down too hard or the treats will be dense.
- Let sit at room temperature for roughly 1 hour (see note), then remove from the pan and cut into 16 rectangles by cutting the whole thing in half lengthwise then cutting 2 rows of 8 rectangles.
- Set a large wire rack on parchment paper and lightly spray it with baking spray.
- Melt milk chocolate melting wafers in a small bowl. Once completely melted, dip the top and sides of each rectangle about halfway up, then let any excess melted chocolate drip off. You can dip the bottoms if you want to, but I personally find it just makes them a little messier and can make them stick to the wire rack. Set each on the wire rack until chocolate has fully hardened (see note).10 ounces milk chocolate melting wafers
- Melt the dark chocolate in a small bowl then pour into a ziplock bag. Cut just the tip off one corner, then drizzle each milk chocolate section of the rice krispies treats with the dark chocolate. Sprinkle with flaky salt right away, let the chocolate set, then enjoy immediately for the best texture!flaky salt, 4 ounces dark chocolate melting wafers


Leave a star rating and comment, ask a question, or share a tip!